
Introduction
Creating your own wedding flowers is a cost-effective approach to saving money on wedding planning without compromising style. DIY wedding flowers give your arrangements a unique touch and let you tailor them to your theme. We’ll lead you through the process of making gorgeous wedding flowers at home with little expense and work in this guide.
Despite being one of life’s most memorable occasions, weddings may be very expensive. Flowers are one area where couples frequently spend a lot of money. DIY wedding flowers are the ideal way to add a unique touch to your big day while saving money.
You might be surprised to learn how simple it is to make your own floral arrangements! This article can help you create gorgeous wedding flowers at home without any worry, whether you’re making bouquets, centerpieces, or boutonnieres.
Why Choose DIY Wedding Flowers?
DIY wedding flowers are chosen by couples for a variety of reasons. Because fresh floral arrangements from a florist can be very expensive, one of the biggest advantages is the cost savings. You can save money while maintaining an opulent appearance by manufacturing them yourself.
Complete customization is an additional benefit, giving you the freedom to select the precise flower combinations, colors, and styles that best suit your preferences. DIY wedding flowers also give your special day a heartfelt and personal touch, which increases its significance. Finally, engaging in a creative endeavor such as this can be satisfying and enjoyable, particularly if friends and family are involved.
Getting Started with DIY Wedding Flowers
1. Choosing the Right Flowers for Your Wedding
Choosing the appropriate flowers is essential to getting the ideal appearance and making sure the arrangements endure the duration of the event. Make sure the flowers you choose go well with your overall theme by taking into account the color scheme of your wedding. Seasonality is another crucial consideration; some flowers are available all year round, while others might only bloom during particular times of the year, which can have an impact on price and availability.
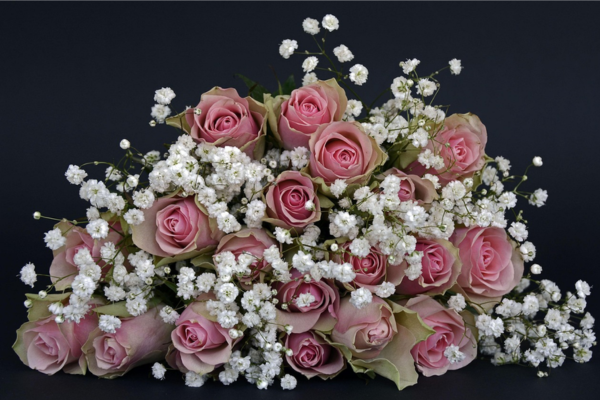
For instance, sunflowers flourish in the summer, whereas peonies are favored in the spring. Furthermore, you should pick resilient and long-lasting flowers, such as baby’s breath, carnations, and roses, which endure well throughout the day without fading too soon.
2. Understanding Flower Seasonality
Using locally grown and in-season flowers is one approach to reducing the cost of DIY bridal bouquets. In addition to being fresher, seasonal flowers are also less costly. A brief overview of floral seasonality is provided here:
- Spring: Peonies, tulips, ranunculus, lilacs
- Summer: Roses, hydrangeas, sunflowers, dahlias
- Fall: Chrysanthemums, marigolds, calla lilies, zinnias
- Winter: Amaryllis, holly, poinsettias, anemones
Consider artificial or dried flowers as substitutes if you’re looking for a certain kind of flower that’s not in season. Superior silk flowers can be as beautiful and timeless as mementos.
3. Essential Tools and Supplies
To ensure a seamless and effective bridal flower arrangement, you must first collect the necessary equipment and materials. The most essential supplies are ribbons or twine for artistic wrapping, floral tape and wire to assist secure arrangements, and floral scissors or garden shears for clean stem cutting.
Floral foam may also be necessary if you’re creating centerpieces because it keeps flowers in position and keeps them hydrated. Classic glass vases, mason jars for a rustic appearance, or even wooden boxes for a more vintage vibe can be used as vases and containers. The process will be a lot simpler and more pleasurable if you have all of your materials available before you begin.
Step-by-Step Guide to Making DIY Wedding Bouquets

1. Selecting Flowers and Greenery
Greenery, filler flowers, and main flowers are all included in a well-balanced bouquet. Roses, peonies, and dahlias are examples of focal flowers, which are the statement blooms that attract the most attention. Waxflowers and baby’s breath are examples of filler flowers that offer texture and volume.
A natural and fresh finishing touch is offered by greenery, such as ferns or eucalyptus. Your bouquet will appear large and expertly designed if you choose a range of textures and forms.
2. Prepping and Conditioning Flowers
Your flowers must be carefully prepared and conditioned before being arranged in order to prolong their freshness. To help flowers absorb water more effectively, start by cutting the stems at a 45-degree angle while running water. To produce a neat appearance, trim off any broken petals and extra foliage.
The flowers should be left to hydrate for a few hours, preferably overnight, in a bucket of cool water. They will remain vivid and fresh for your wedding day thanks to this method.
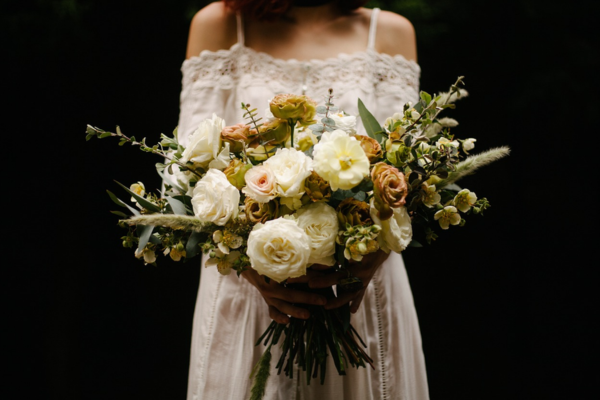
3. Arranging a Hand-Tied Bouquet
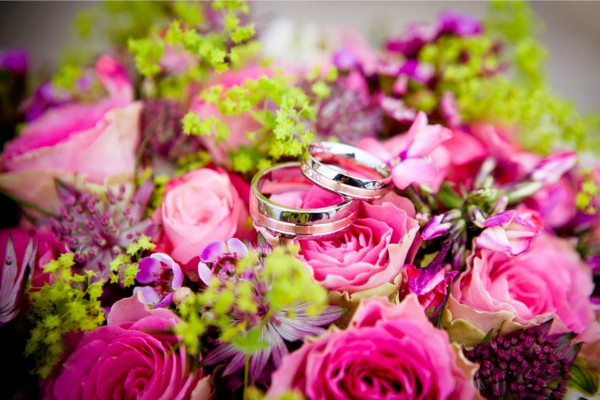
Choose a central flower first, then work your way around it by adding supporting flowers to make a hand-tied bouquet. To guarantee an even and organic shape, hold the bouquet loosely in one hand and add flowers with the other, turning as you go. After you are satisfied with the arrangement, attach the stems together using floral tape. For a refined and tasteful touch, wrap the bouquet with ribbon or twine. For a more unique look, you can also add charms or decorative pins.
Step-by-Step Guide to Making Boutonnieres
Usually worn on the lapel, boutonnieres are tiny floral arrangements worn by the groom, groomsmen, fathers, and other distinguished guests at a wedding. A quick and affordable option to give your wedding a unique touch is to make your own boutonnieres. Use this detailed tutorial to create sophisticated, polished boutonnières at home.
Materials Needed for DIY Boutonnieres
Prior to beginning, collect the following materials:
- Artificial or fresh flowers, such as orchids, spray roses, baby’s breath, or roses
- Greenery (ferns, myrtle, or eucalyptus)
- Floral tape (to hold the stems in place)
- Wire for flowers (for extra support)
- Twine or ribbon (for a refined appearance)
- To cut stems, use floral shears or scissors.
- Clips or pins (to fasten the boutonniere to apparel)
Step 1: Select and Prepare the Flowers
Start with selecting a little flower to serve as the boutonniere’s main attraction. Traditional choices include:
- One orchid, carnation, or rose for a classic style
- For a softer, more romantic vibe, spray roses or ranunculus.
- For a bohemian or rustic look, use baby’s breath or tiny wildflowers.
After selecting the flowers, clip the stems to a length of 3–4 inches. To guarantee a neat and polished appearance, trim off any extra leaves or thorns. Put floral wire through the base of the bloom and wrap it around the stem of the flower to strengthen it if it is brittle.
Step 2: Add Greenery and Filler Flowers
Your boutonniere gains depth and complexity from the addition of greenery and filler flowers. Pick little myrtle, fern, or eucalyptus sprigs to go with the main flower. For a well-balanced and organic appearance, arrange the foliage behind or surrounding the main bloom.
To improve the arrangement, position filler flowers—like waxflowers or baby’s breath—slightly behind the primary flower.
Using one hand, hold the greenery and flowers together and move them around until you have the shape you want.
Step 3: Secure the Arrangement with Floral Tape
After you are happy with the shape of the boutonniere, attach the stems using floral tape. Pull the tape gently to make it sticky, then wrap it down from the top, just below the bloom. Wrapping should continue until the entire stem is hard and coated. Floral tape allows for more tweaks while keeping everything in place.
Step 4: Wrap the Stems with Ribbon or Twine
Use ribbon, lace, or thread to cover the floral tape on your boutonniere to give it a refined and sophisticated appearance. For a matched effect, use a ribbon that complements the colors of your wedding.
- Apply a tiny bit of hot glue to the boutonniere’s back after cutting a 6 to 8-inch piece of ribbon.
- Cover the floral tape fully with the ribbon as you begin winding it from the base of the bloom downward.
- Use a discrete pin or another dab of glue to secure the end.
For a more organic and vintage look, use twine rather than ribbon for a rustic wedding.
Step 5: Attach the Pin and Store the bouquet.
After wrapping the boutonniere, fasten it to the back with a boutonniere pin or tiny safety pin. To make attaching the pin to a lapel easier, it should be positioned horizontally.
Store the boutonnieres in a cool, dry location until the wedding day if you’re making them ahead of time. To keep them moist, store fresh flower boutonnieres in the refrigerator in a plastic container covered with a moist paper towel.
How to Pin a Boutonniere Correctly
The following procedures will help you wear the boutonniere correctly:
- Put it just over the heart on the left lapel of the suit jacket.
- Arrange the boutonniere such that the stems are slightly inclined downward and the bloom is erect.
- Push the pin through the flower stems and back into the cloth after inserting it from the rear of the lapel.
- Verify that the boutonniere is firmly attached and does not slant forward.
Tips for Perfect DIY Boutonnieres
- Use sturdy flowers that don’t immediately wilt, like succulents, carnations, or roses.
- Avoid overly large flowers Wearing a boutonniere should be comfortable and light.
- Make extras in the event of last-minute accidents or damage.
- Practice ahead of time to make sure you’re at ease with the procedure if you’re new to floral arrangements.
Making your own boutonnieres saves money and gives your wedding a kind, personalized touch. You can create stunning, expert-looking boutonnieres that precisely match your wedding theme with a little practice.
Using Seasonal and Local Flowers
Choosing seasonal and locally grown flowers is one of the greatest methods to ensure fresh, high-quality blossoms for your do-it-yourself wedding arrangements while also saving money. Seasonal flowers are more readily available and less expensive since they bloom naturally during a particular time of year.
They are frequently fresher, more colorful, and last longer than out-of-season flowers because they don’t need to be imported or kept in particular circumstances. For instance, sunflowers and dahlias do well in the summer, but peonies and tulips are perfect for a spring wedding. Consider utilizing calla lilies, marigolds, or chrysanthemums for your fall wedding; amaryllis, poinsettias, and anemones are excellent options for winter nuptials.
Another great choice is local flowers, which are frequently grown organically, support small farms, and save money on transportation. You can select distinctive flowers that complement your color palette and lessen your environmental impact by purchasing from local flower farms or farmer’s markets. Additionally, flowers that are cultivated nearby are frequently cut at their freshest, guaranteeing that they will look their best on your special day.
Ask a local florist or greenhouse for suggestions if you’re not sure which flowers are in season. Using wildflowers or garden-grown flowers is another excellent option to use local flowers; they may give your arrangements a rustic, organic charm.
Focusing on local and seasonal flowers not only cuts expenses but also produces gorgeous, fresh, and environmentally friendly floral arrangements that capture the essence of your wedding season. This method guarantees that your flowers are durable and ideal for your special day, whether you’re creating bouquets, centerpieces, or venue decorations.
Repurposing Flowers from Ceremony to Reception
Reusing the flowers from the ceremony to the reception is one of the best strategies to make the most of your wedding floral budget. You can thoughtfully organize to repurpose bouquets, aisle decorations, and altar flowers to improve your reception area rather than buying unique floral arrangements for each event. This not only saves you money but also lessens waste and extends the time you can enjoy your lovely blooms.
Creating flower arrangements with several uses is a fantastic place to start. For instance, by arranging the bridesmaids’ bouquets in vases on reception tables following the ceremony, they might serve as centerpieces. In the same way, altar flowers or arch decorations can be moved to decorate the buffet station, guest book area, or sweetheart table.
You can quickly move aisle flowers that are affixed to seats or pews to adorn cocktail tables, the cake table, or the reception entry. You can even use the flower garlands that were used for the ceremony background to frame a photo booth or the head table.
A reliable wedding coordinator, friend, or relative should be assigned to transfer the arrangements between locations to ensure a smooth transition. Additionally, using foam floral bases or portable containers can facilitate the transfer and shield the flowers from harm. Pick resilient flowers that can tolerate movement without wilting, such as lilies, roses, carnations, and eucalyptus.
You can get the most out of your wedding flowers and maintain the exquisite décor of your location from beginning to end by creatively recycling them. Every petal has a purpose thanks to this economical and environmentally beneficial method, making your wedding both beautiful and sustainable.
Frequently ask question [FAQs]
To keep them fresh, flowers should ideally be arranged one to two days prior to the wedding.
For do-it-yourself crafts, sturdy flowers like baby’s breath, carnations, and roses are ideal.
Store them in a cool location, keep them hydrated, and sometimes spritz them with water.
Practice beforehand and begin with basic setups.
Indeed! A stunning and durable arrangement can be made by combining silk and fresh flowers.
Conclusion
Making your own wedding flowers is a lovely way to add personal touches to your special day while saving money. You can make beautiful floral arrangements that seem as professional as those from a florist if you plan ahead, have the correct supplies, and use a little imagination. The secret is to pick flowers carefully, prepare them correctly, and use basic design principles. You may still produce stunning outcomes that will wow your guests and add even more special touches to your wedding, even if you’re a novice.